


Alamofire is a powerful tool for making API requests in Swift apps. It simplifies networking tasks, making it easier for beginner developers to interact with APIs. Alamofire is a Swift library that abstracts away the complexities of networking. It provides a clean and simple interface for making HTTP requests and handling responses.
Keywords => Simple GET Request, JSON-Response Parsing
Contents:
Installing and Importing Alamofire
Creating a DataModel struct based on the API response JSON's properties
Making a GET Request and handling the Response
Installing and Importing Alamofire
Installation of Alamofire can be done by using CocoaPods or by using the Swift Package Manager. Here, I shall be using CocoaPods for the purpose.
(For those who are unaware of CocoaPods, is a dependency manager for projects developed on the primary Apple Platforms (viz. iOS, macOS, watchOS, iPadOS and selectively for VisionOS). It simplifies the process of integrating and maintaining third-party libraries in the native projects. It's like what NodePackageManager (npm) is for Node.JS, CocoaPods is for Swift/Obj-C.)
If you have CocoaPods already installed in your system, then head on to the next step else you can install it using HomeBrew by using the command below in your terminal
brew install cocoapodsNow, to check if CocoaPods is successfully installed , run the command
pod --versionOnce, CocoaPods has been installed, it's time to import Alamofire in the project
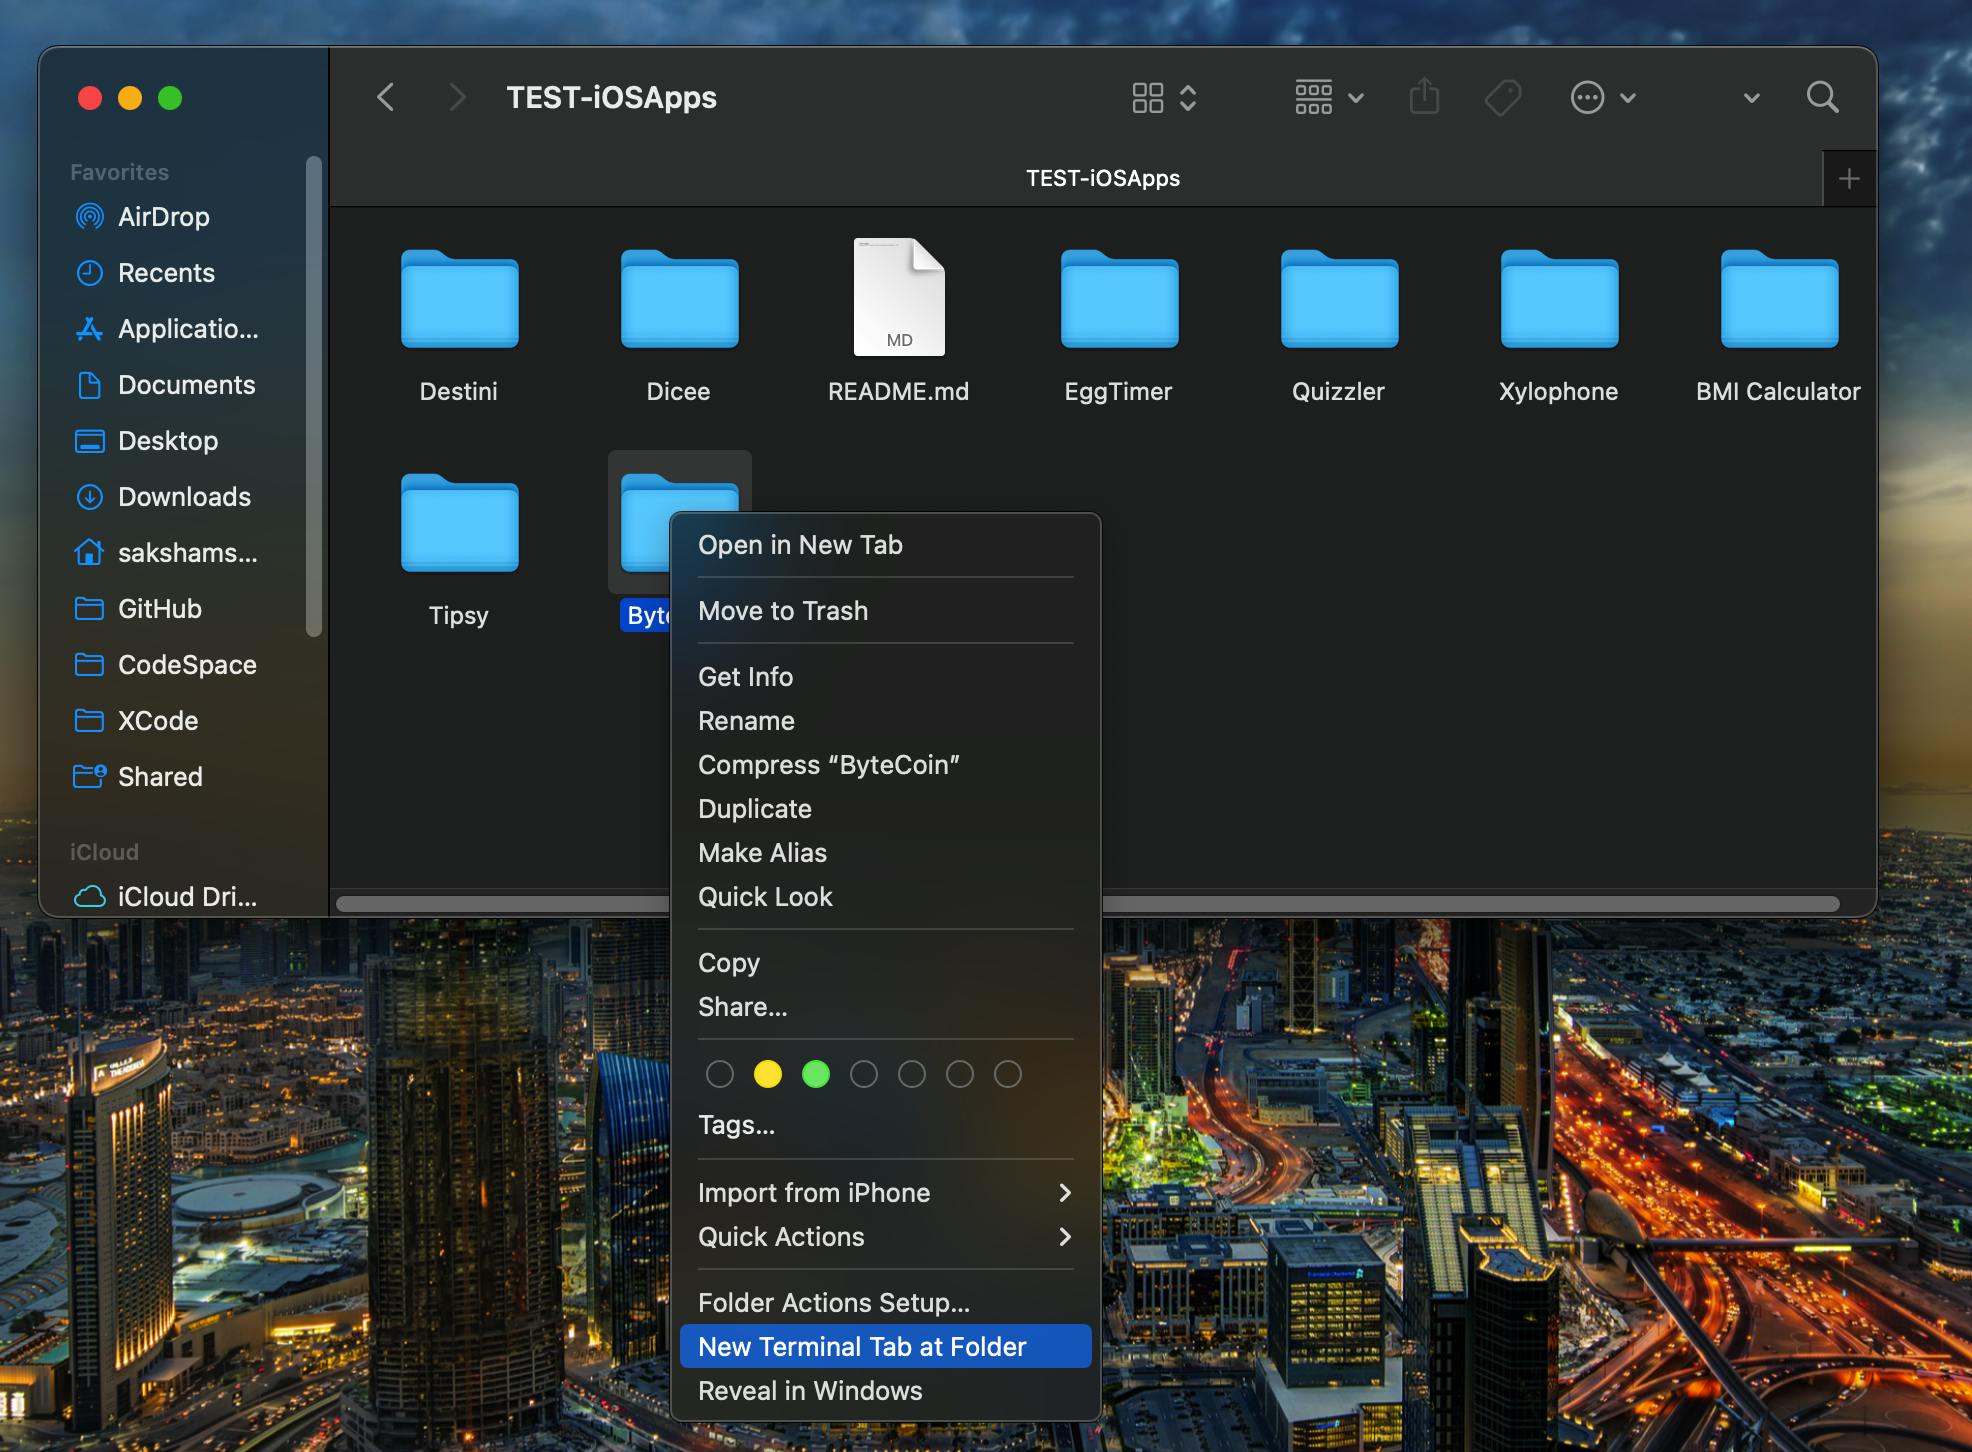
Using Finder, move to the parent directory of the project in which you want to import Alamofire and open it in terminal. To open the project folder in terminal, right-click on the folder and select New Terminal Tab at folder or Services > New Teminal Tab at the Folder. Alternatively, you can use Terminal to navigate to the folder if you are comfortable with it.
(Here, I wanted to open the ByteCoin Folder which contains my Xcode Project)
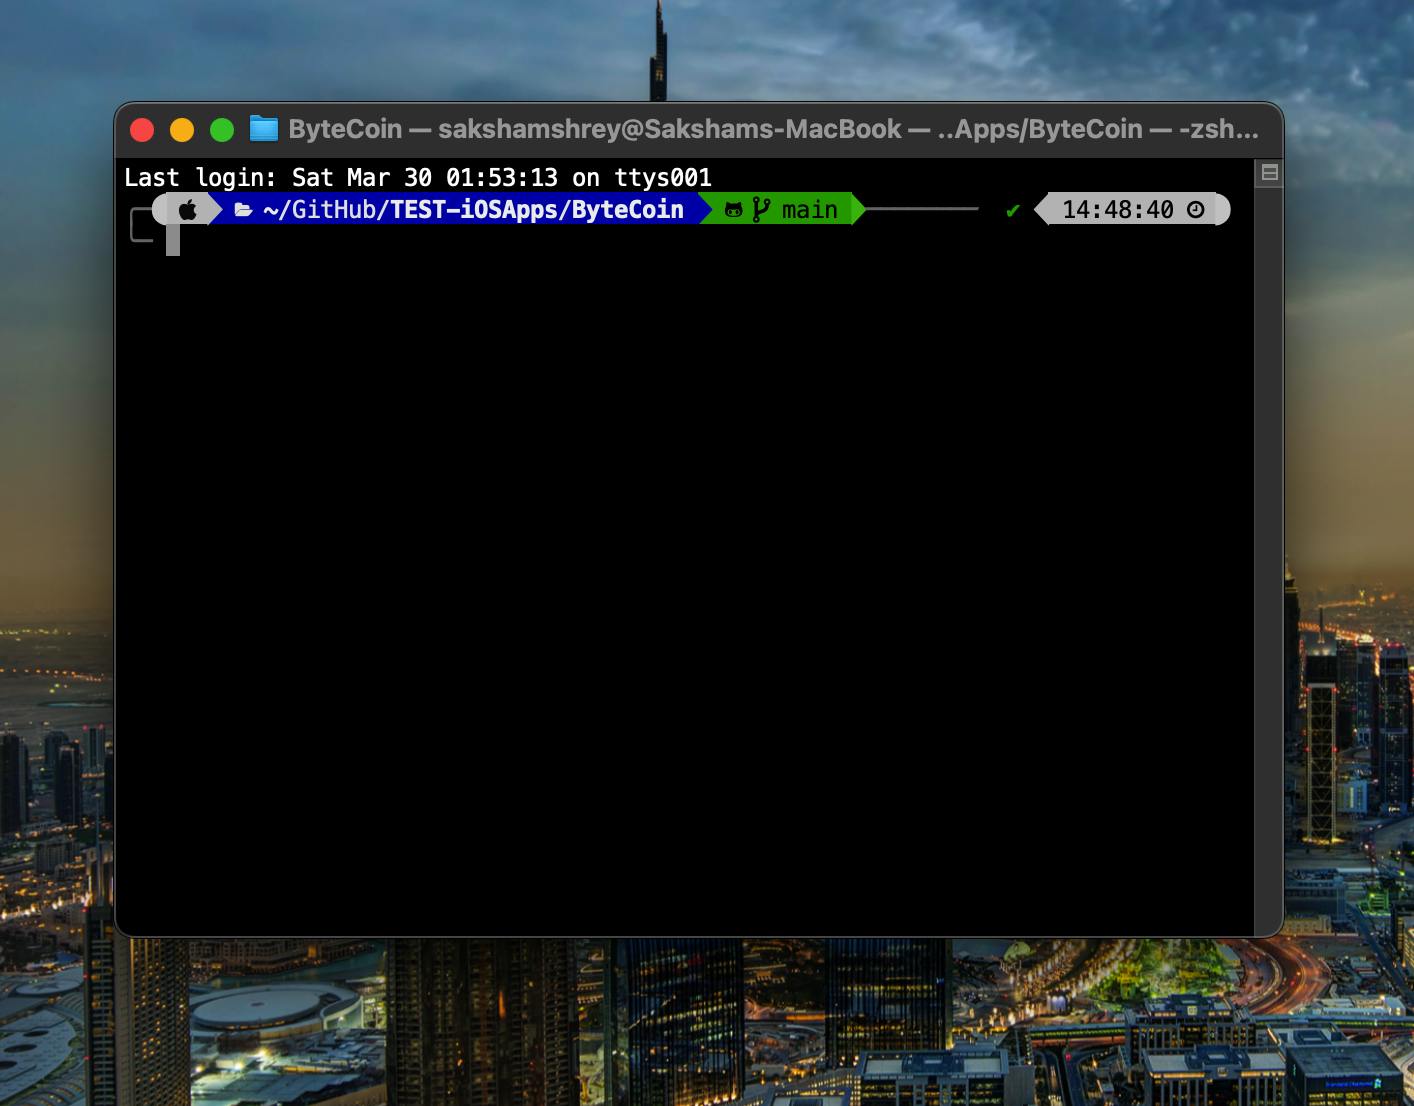
(A Terminal will be opened like this)
- Now, Enter the following command in the Terminal:
pod init
(This will initialize the project to use CocoaPods as the dependency manager)
As soon as you click enter, 4 new files will be created in the Project Folder (namely: Podfile, Podfile.lock, <directory>Pods, and <ProjectName>.xcworkspace.)
Open the "Podfile" by opening the project folder and double clicking on it or by using the Terminal command: $
open Podfile(It will open the Podfile in the default text editor.)
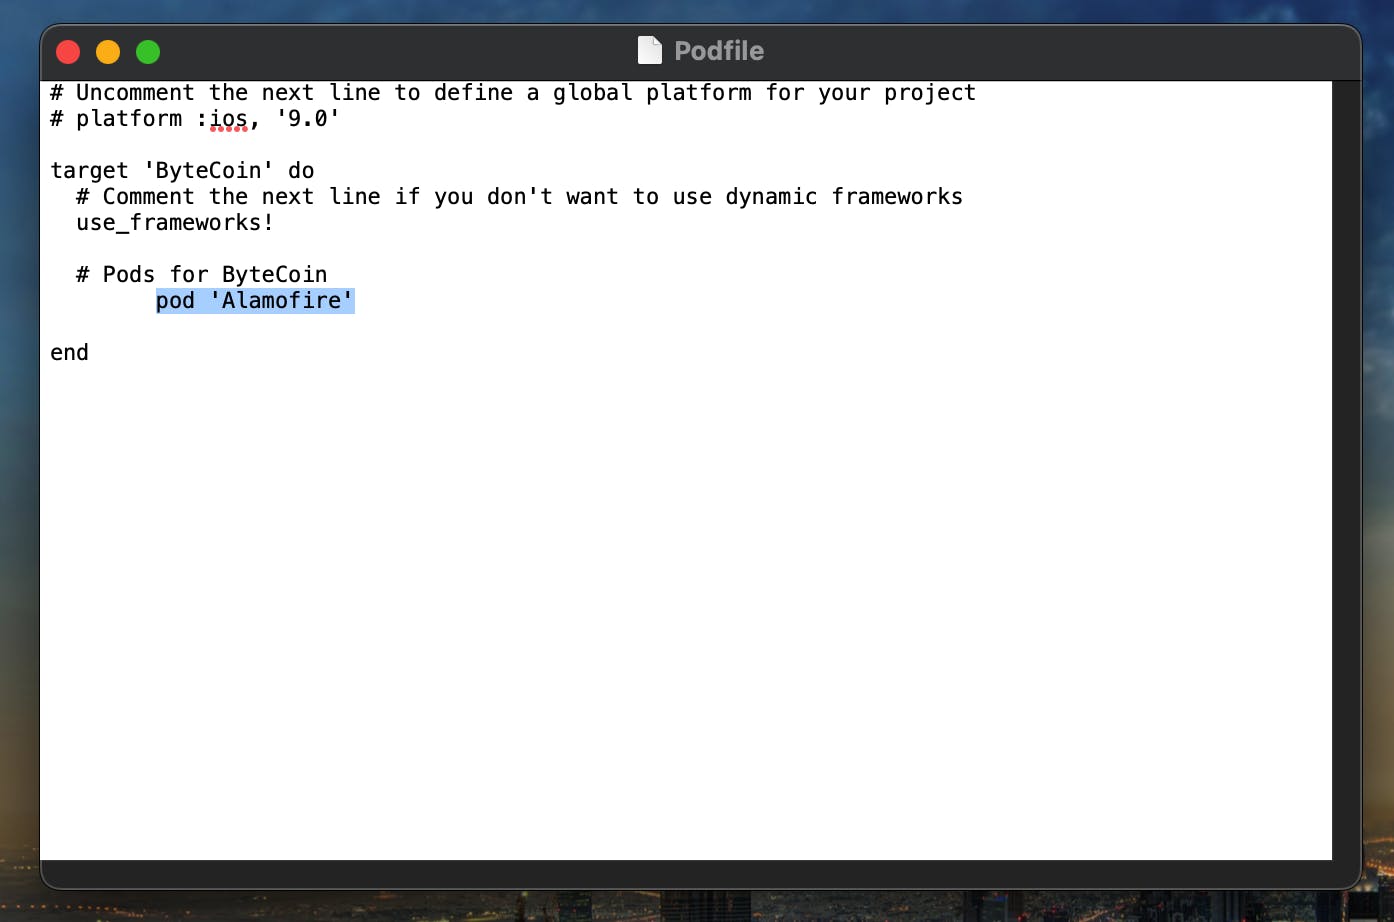
In the Podfile, just below the line, " # Pods for <ProjectName> " and before the word "end" , type the following text
pod 'Alamofire'and press CMD+S to save the file and then close it.
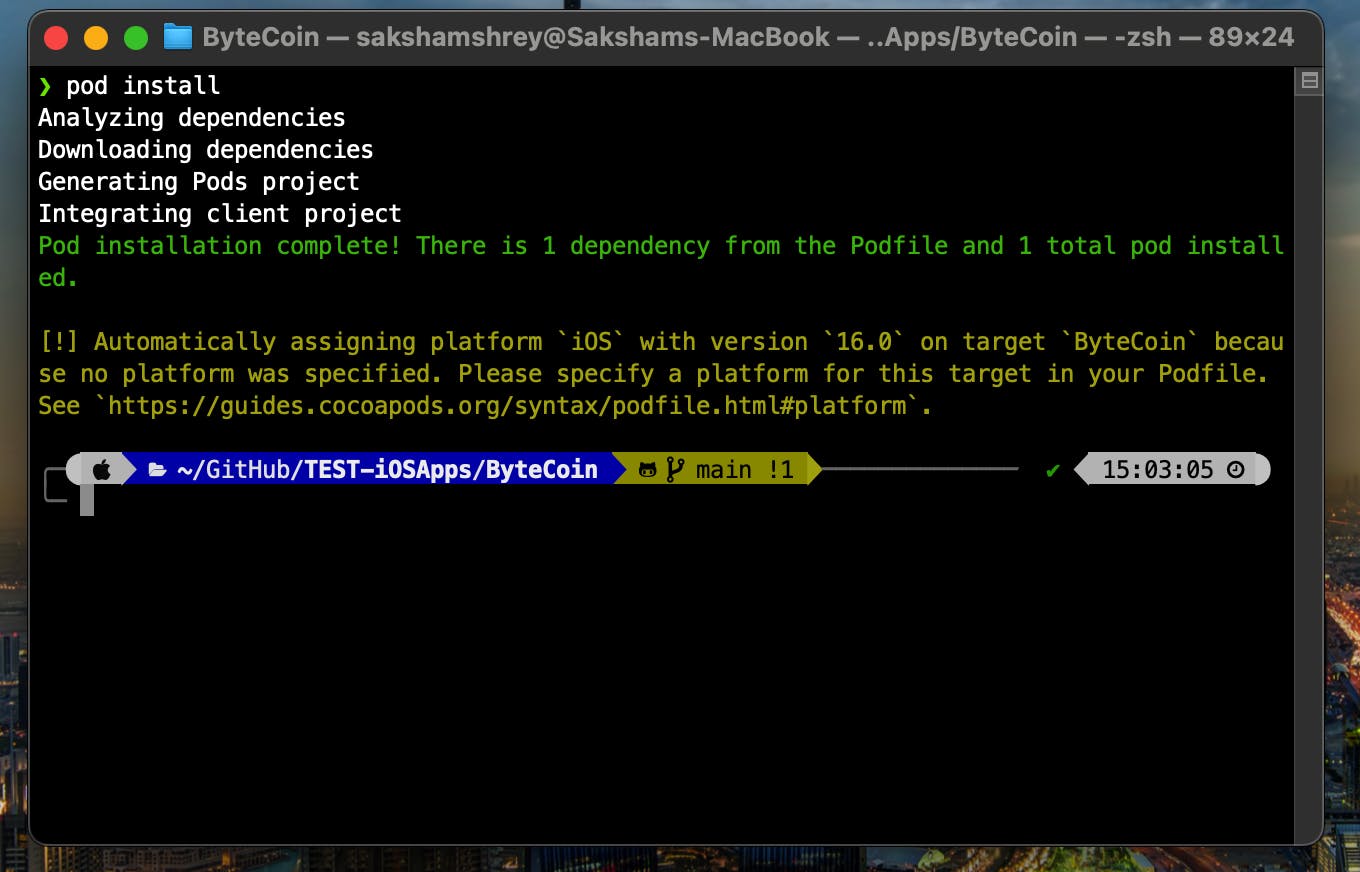
- In the terminal, type the command: $
pod installwhich should install the Alamofire dependency.
Now, using the Finder, open the <ProjectName>.xcworkspace present in the Project Directory. It should open Xcode.
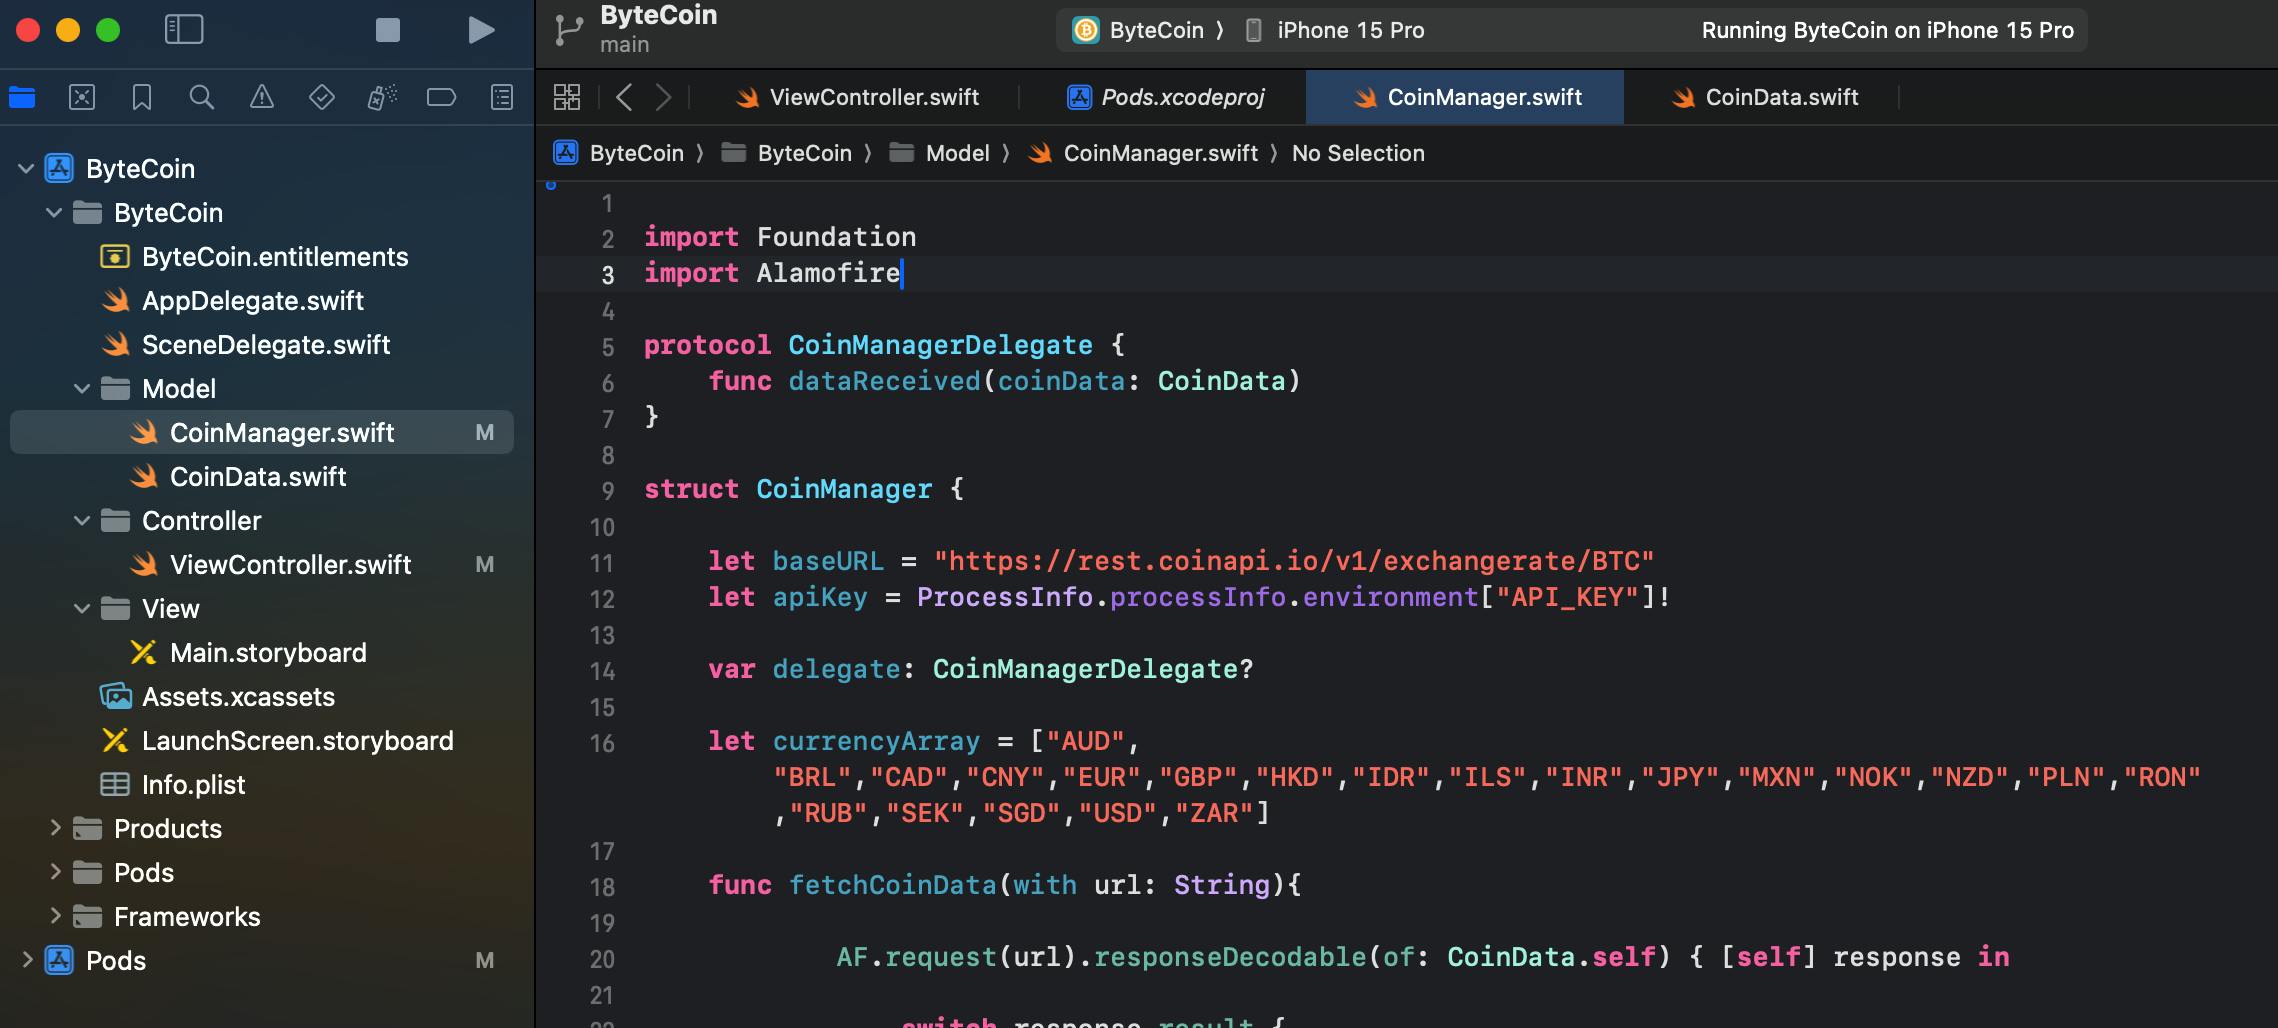
- Once Xcode is opened, go to the file where you want to use Alamofire for making the API requests. On top of the file contents, write the import statement to import Alamofire: $
import Alamofire
- Once Xcode is opened, go to the file where you want to use Alamofire for making the API requests. On top of the file contents, write the import statement to import Alamofire: $
(Here, I will use Alamofire in the CoinManager.swift file)
Creating a DataModel struct based on the API response JSON's properties
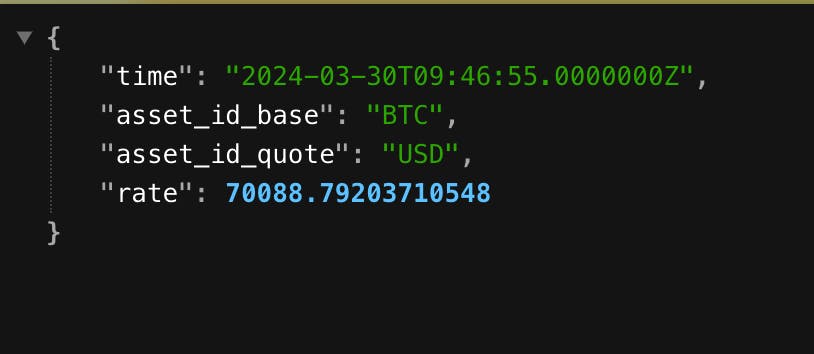
Take a look at the structure of the JSON data which you aim to receive.
(Here, I will be using the coinapi.io API for fetching the current exchange rate of BitCoin, and the JSON response is shown below)
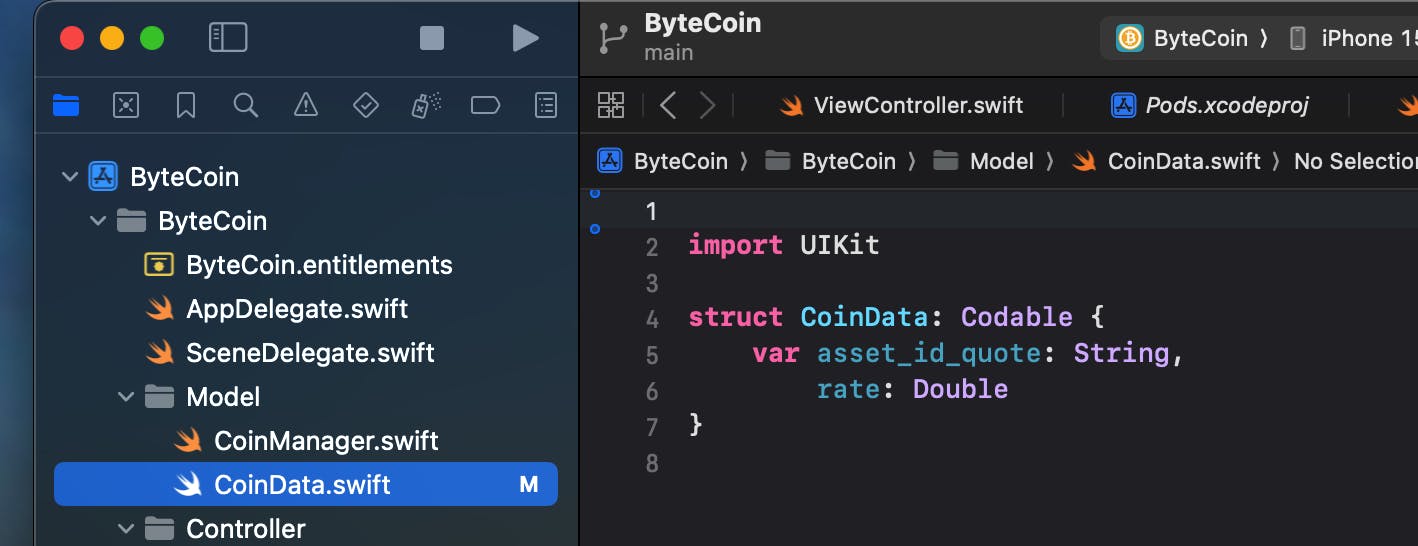
- Using the JSON-response as the reference, create a DataModel to receive and use the data from the JSON-response considering the values you want to use or all of the values.
(Here, I have created the CoinData.swift file containing the variables asses_id_quote and rate since these are the only values I need from the JSON-response)
-
NOTES: - 1. Don't forget to make the DataModel to conform to the Codable Protocol. Just add : Codable { .... } to do so
- 2. The field names in the DataModel should have the same names as those of the JSON-response.
Making a GET Request and handling the Response
Now comes the main part, Making the Request and Receiving the Response.
For this, paste this code where you want to make the requests and modify it as per your requirements:
AF.request("YOUR_API_REQUEST_URL").responseDecodable(of: <DataModel>.self) { response in
            // A request is made to the URL and a response is expected which shall be decoded in the format of DataModel

            // The returned Response is stored locally as "response" and is then used to check for success or failure of the request using the .result

            switch response.result {


                // If the request is successful, then the returned data from the response is stored locally as ReceivedDataInDataModelFormat which can be used further as per the requirements
            case .success(let ReceivedDataInDataModelFormat):
                // Handle the received data accordingly
                // print(ReceivedDataInDataModelFormat.<property_name>)

                // If the request is not successful, then the returned Error is stored with the local name ReceivedError which can be handled appropriately
            case .failure(let ReceivedError):
               // print(ReceivedError.localizedDescription)
            }
        }
Generalized Explanation:
Alamofire makes request using the AF.request("URL") function and receives response which gets decoded in the "DataMode" format.
AF.request returns response which could be either the DecodedData i.e a Success which means the API request was successful and Data is received in the Decoded DataMode format or the response could be an Error i.e a Failure which means that the request was not successful and the data is not received
The response is handled using Switch-Case statements
case .success(let <ReceivedDataInDataModelFormat>): --> refers that the Request was successful and the data which has been received in DataModel format has been stored with the local-name <ReceivedDataInDataModelFormat>. Now the data properties can be accessed and utilized.
case .failure(let <ReceivedError>): --> refers that the Request was not successful and there was some error. The Error could be handles or printed for debugging as per the requirements.
(Here's how I have implemented it in my referenced project file. The explanations are served in form of the adjacent comments.)

That was it ..Hope it was concise and precise !!
For any queries or disputes, feel free free reach out to me: sakshamshrey@gmail.com
Appendix:
My Reference Project Repository Link: https://github.com/Saksham-Shrey/TEST-iOSApps/tree/main/ByteCoin
Alamofire Documentation: https://alamofire.github.io/Alamofire/
- P.S.
- - I have elaborated on multiple things to ease the beginners.
- - The project reference that I have provided is of an application that displays the price of bitcoin in various currencies as per the user's choice. I developed this project while I was learning iOS Development from Angela Yu and the London App Brewery. The starting files for this project were forked from the London App Brewery's GitHub and then modified by me to include the API requests functionality using CocoaPods and Alamofire. All the rights of the starting files for this project are held by Angela Yu and the London App Brewery.